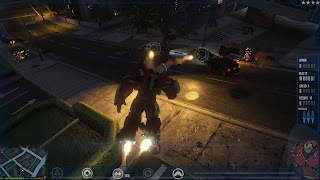
Hope that this blog post help people install the IronmanV and the armors, download links are some lines below in Downloads section.
Download Script (Required)Download the script here*Make sure you have the required windows packages for ScripthookVDotNet: http://gtaxscripting.blogspot.com.br/2015/06/gta-v-net-scripts-setup.htmlDownload of Armors (Optional)Armor - Mark III armor by JulioNIB:
Main link - MirrorArmor - Mark III armor by Rarefacer:
Main link - Mirror (Blue version: here)Armor - Mini Hulkbuster armor:
Main link - Mirror 1Armor - War Machine armor:
Main link - Mirror 1 (Don't forget to update your script)Armor - Hammer Drone armor:
Main link - Mirror 1 (Don't forget to update your script v1.5 or later)
You can watch the full installation guide here :
https://youtu.be/7YM-_VRs0v4 (PT-BR)
https://youtu.be/bmug9c8wLsA (EN)
Or see how to install .OIV packages here:
Restoring models
Case you want restore the props (Objects) that the armors installations replaced, you can do it using
this restore pack.
Issues and solutionsProblem: Nothing happens when you press Ctrl+N
Solution: Make sure you installed the script, also make sure that ScripthookVDotNet is working
Problem: Script asks for activation
Solution: Activate the script using
this blog postProblem: Script stop working when you choose a armor
Possible solution: Update your ScripthookV and ScripthookVDotNet
Problem: Armor don't appear, some weird objects appear instead
Solution: Avoid game updates or use the mods folder idea
Problem: Armor parts are distant from player char. (wrong offset)
Solution: Use the .ini armor file that goes with the armor, if problem persists replace the commas with dots in the numeric values of the armor .ini file, example: from 0,25 to 0.25
Armors setup guide:
-Make sure you have asi loader and OpenIV.asi plugin installed, otherwise you can't load custom game files, you can install it using OpenIV, go to menu Tools > ASI Manager...
-Extract all files to a folder
-Copy content of folder "to scripts folder" to your GTA V scripts folder
-If you don't have a folder called "mods" in your gta5.exe folder, create one.
-Case you don't have a copy of x64g.rpf inside mods folder, make one copy.
-Using OpenIV navigate to mods\x64g.rpf\levels\gta5\generic\cutsobjects.rpf
-Click in Edit mode to enable edit mode
-Click in Edit and then click in Add
-Select the files from folder "armor parts" and click in Open
Hotkeys-Press Ctrl + N to show mods menu, use pg up/down or numpad 8, 2 to navigate, press Enter or numpad 5 to activate selected item
-Special vision modes - I
-Super melee attacks - Q - XBox control: B
-Ground attack - Flight + Q
-Lift/grab entities: Hold Q while in ground
-Weapon mode - E - XBox control DPad right/left
-Shoot with weapons or throw things - Left mouse button - XBox control Right bumper
-Hold space to toggle flight mode
-Flight control - WASD, Shift, Control and mouse.
-Press aim to set/remove targets for darts and missiles
Tip:
Hold attack button when shooting to avoid that player char. keep "punching the air"
Obs.: Some features are specially set for some armors like Hulkbuster, you can change settings in armor .ini file
VideosMaking the mods folderMark III armor release videoMini Hulkbuster armor release videoScreens


Yorumlar
Yorum Gönder